Making matcha whisks in Takayama, Japan
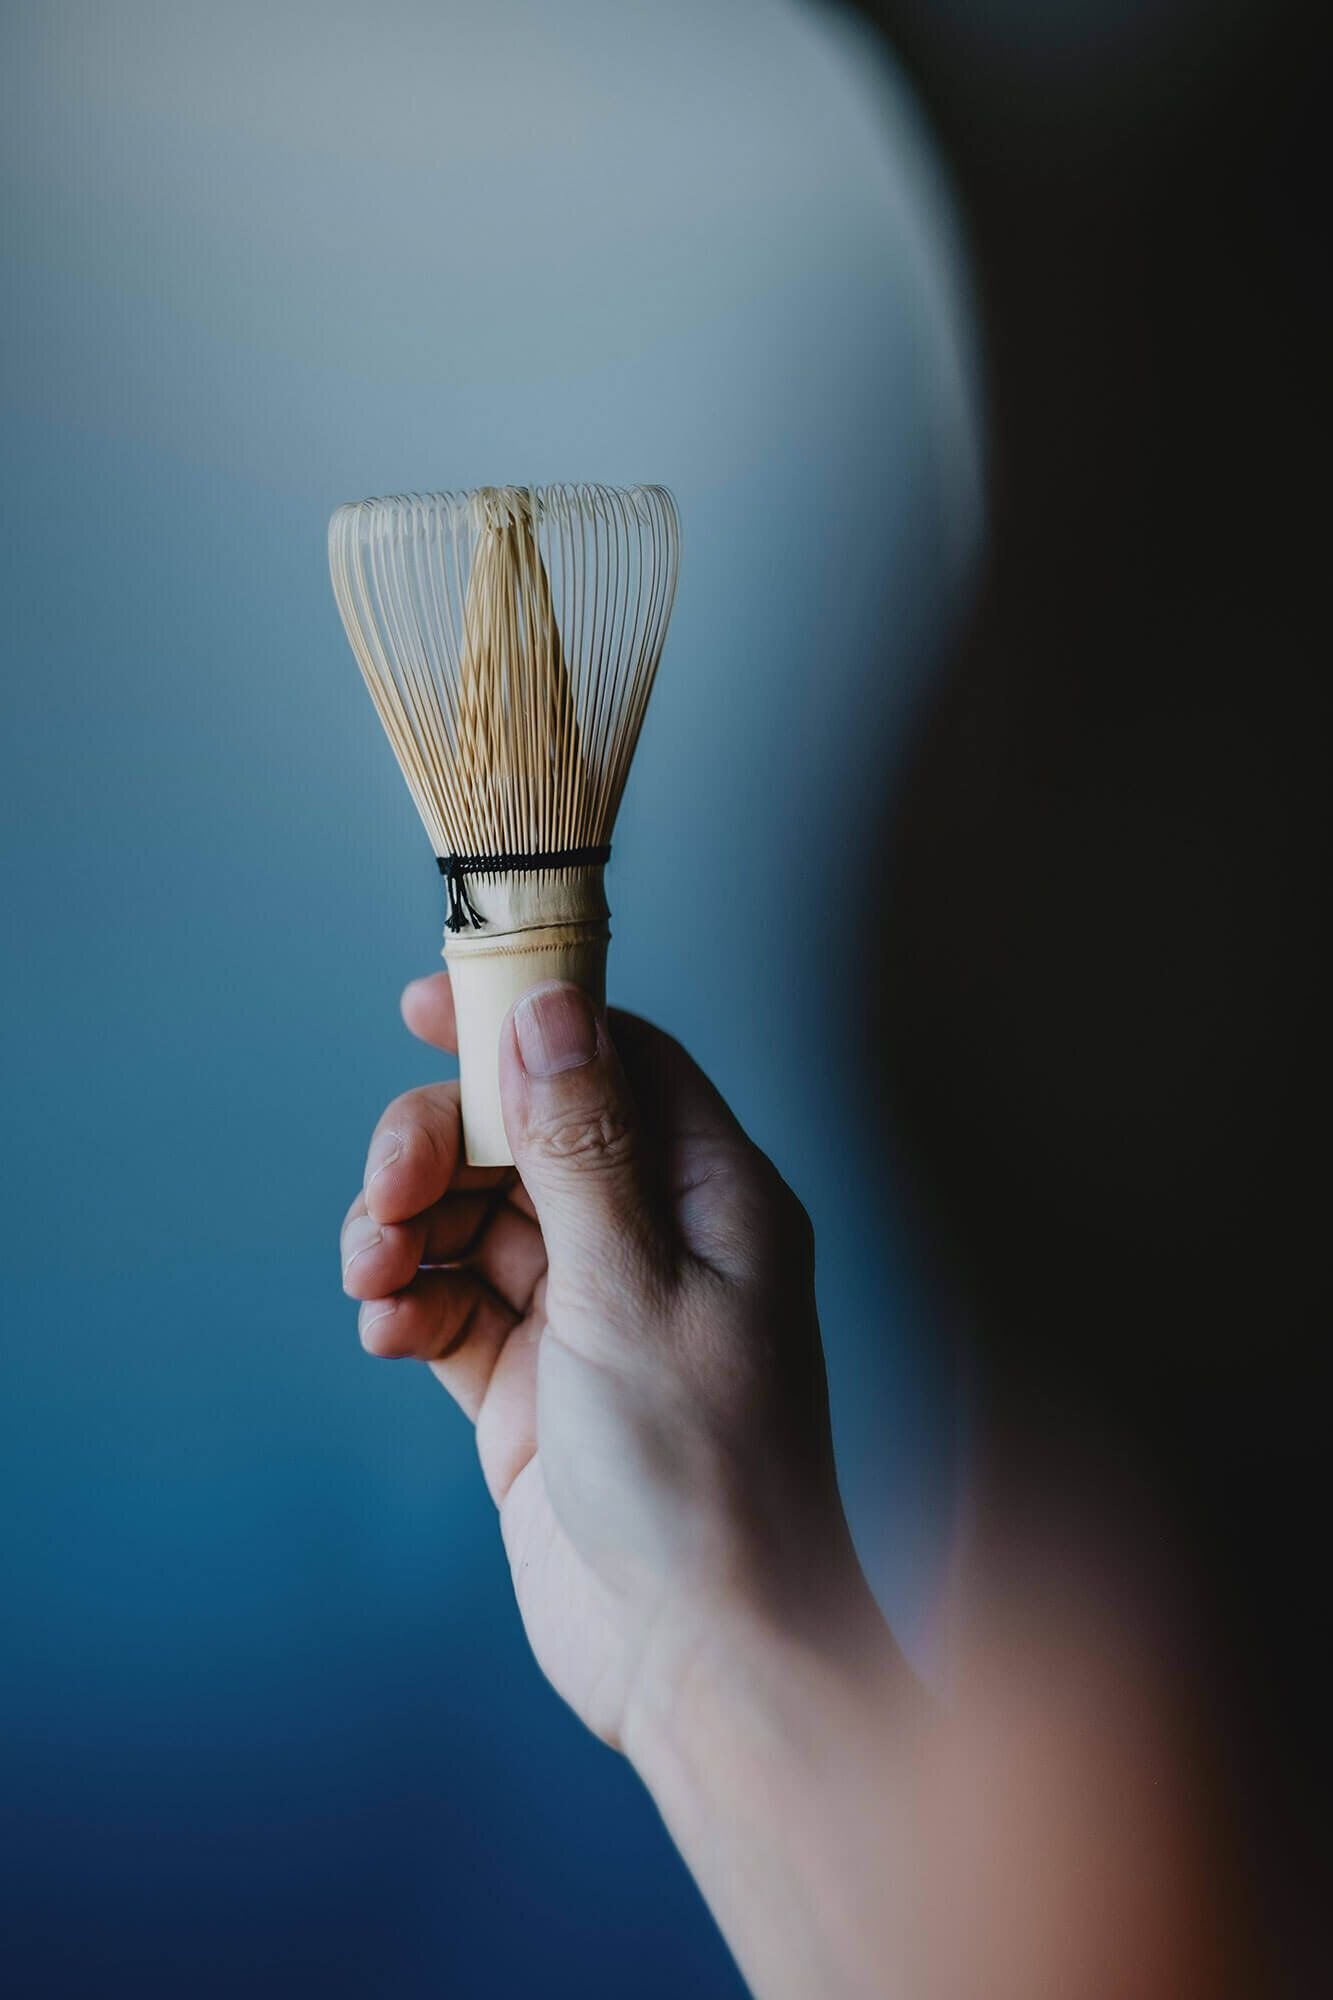
When it comes to making matcha tea, using a proper bamboo whisk, or chasen, is key. It’s the only way to get that frothy, smooth, clump-free, delicious matcha. These unique bamboo tools were created in a small Japanese mountain village almost 500 years ago, and today it’s still the best place in the world to get a whisk for matcha. They’ve been making them for more than half a millenium.
The history of tea whisks in Takayama
Craftsmen have been making tea whisks in Takayama since the Muromachi period—that’s around 1333-1568. It all started with Murata Juko, founder of the Japanese tea ceremony and buddy to the emperor, asked Sosetsu, the second son of Lord Takayama, to make him a tea whisk. The first tea whisk.
Jukō was the one who kicked off the wabi-cha style of tea drinking, which emphasized simplicity, and later became part of the wabi-sabi, an aesthetic view of the world that focuses on acceptance of imperfection.

This is the original tea whisk design! The emperor called it Takaho Chasen.
These whisks, ‘chasen’ in Japanese, are a necessity for tea ceremony, and for making delicious matcha. Takayama Chasen are registered are one of the Traditional Crafts of Japan, a special designation that denotes its importance and regionality. Takayama is also known for its famous knitting needles. Go figure.
The production method of these bamboo whisks was kept secret and guarded. Basically like modern intellectual property. Eventually, the secret of making them was passed on to sixteen of the family’s retainers and the techniques were passed on.
When I asked the master craftsman about how places like China started mass producing bamboo whisks, I got a slightly obfuscated and half-mumbled answer about how someone from one of the bamboo making families had absconded at some point in history with the ‘how-to’ knowledge. The feeling I got from the man we talked to was basically, ‘We don’t talk about that guy here.’
Fair enough—back to whisk making in Japan.
There are many different kinds of Japanese whisk. The 'standard' one you see in most North American stores is based on the Urasenke tea school style.

Right to left, from start to finish the process of making a whisk from a single piece of bamboo.
There are about 120 different kinds of Takayama tea whisk. They vary in material, shape, and the numbers of splines, varying according to the school of tea, kind of tea, and whether it is weak or strong, whether the tea is to be served in a formal setting, or for an outdoor tea ceremony, or a travelling set.
The whisk-making techniques are passed down using the ‘isshi-soden’ tradition, where the techniques are passed down from father to only one child. And let me tell you—they are pretty much all men. Not a lot of female innovation happening in the Japanese tea whisk world. Where my lady whisk startups at?
Apart from traditional matcha whisks, some are now made for more decorative purposes, while others are made to produce a good head of froth for a milky coffee. Whisk craftsmen have been evolving with the time and trends.
Today, the craft is sustained by 19 Master Craftsmen among the 300 people employed by 27 firms in the rural areas of Nara prefecture, around Takayama.
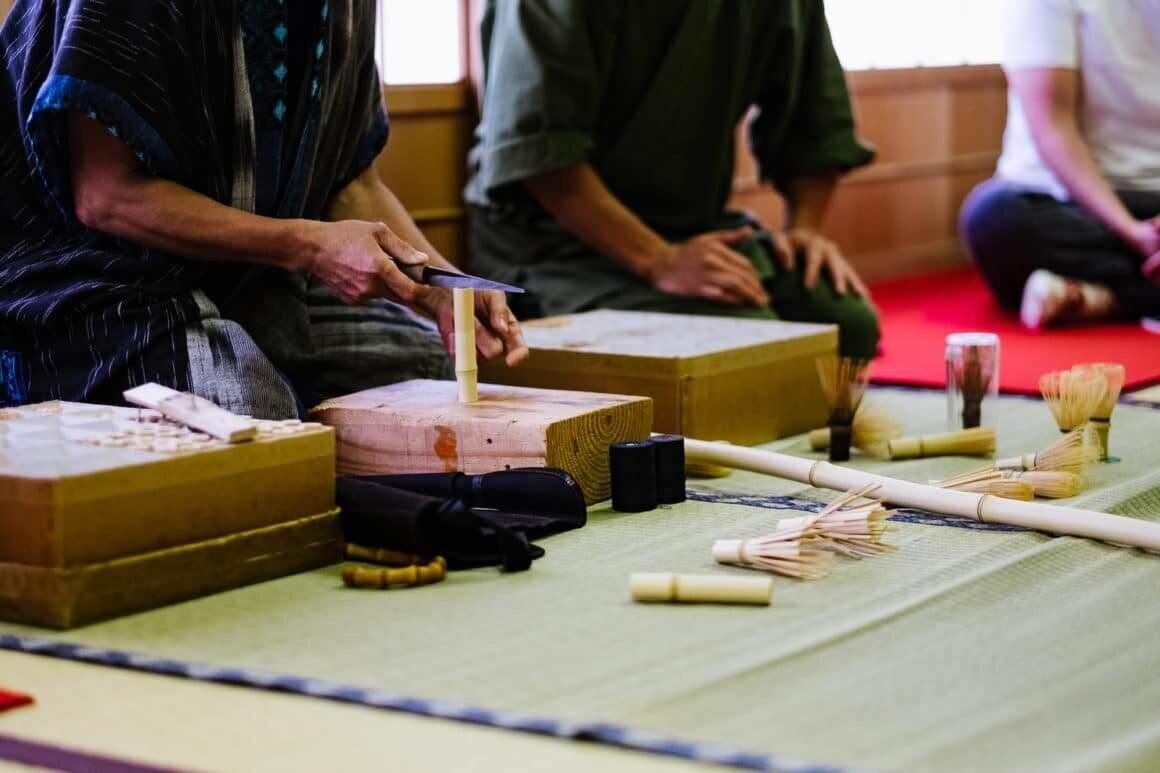
I visited the Takayama Bamboo Garden and Museum with an international group of colleagues from Obubu interested in learning how chasen are made.
If you go, there were some people there who could speak a bit of English, but you’d be better off going with a translator if you don’t speak Japanese. If you visit, you can watch craftsmen make whisks every Sunday, or take tea in the garden with one of their many, high quality whisks.
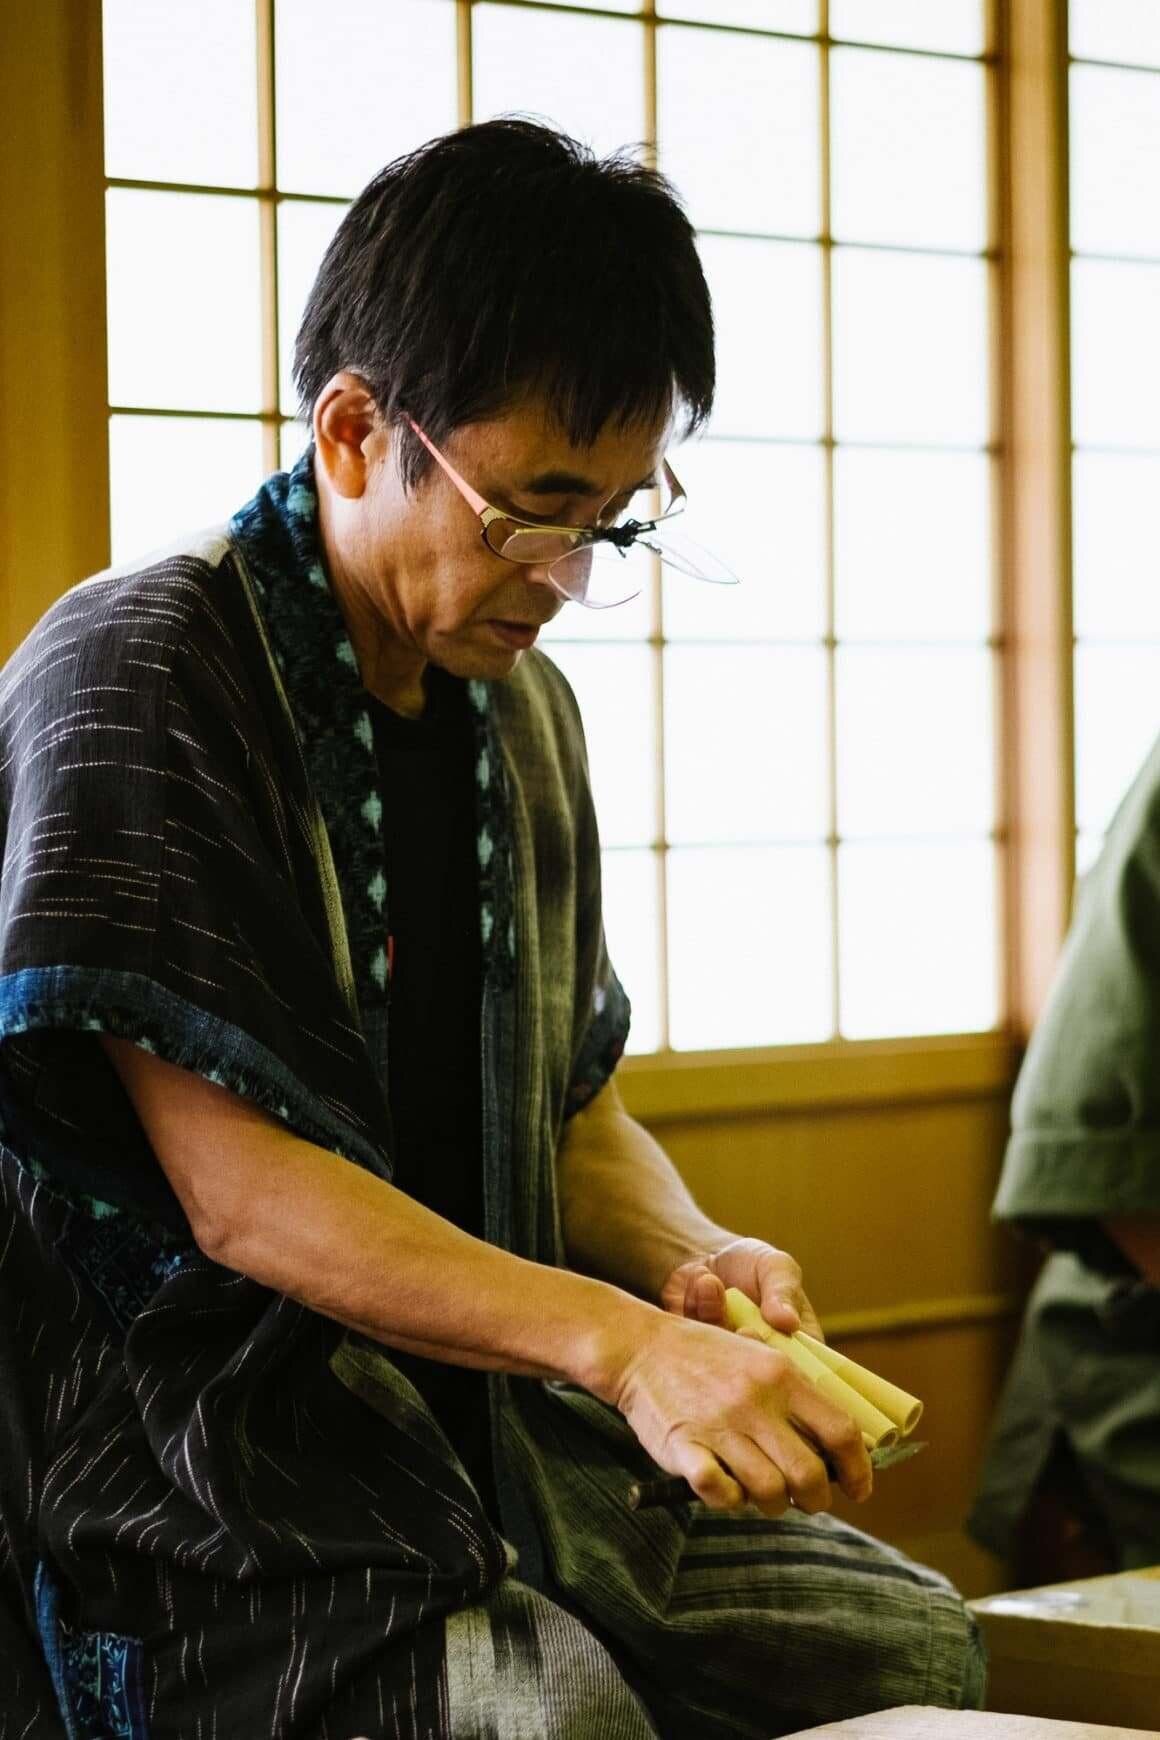
We met with Certified Traditional Craftsman Mr. Inada Yusetsu who showed us the nine stages of making chasen by hand.
The nine stages of handcrafting a matcha tea whisk
STAGE 1: RAW BAMBOO (GENCHIKU)
The hollow stems of bamboo that are two to three years old are cut during the winter and bleached in the sun when it’s cold outside. They are then stored, and cut when needed.

The preferred species of bamboo is hachiku bamboo. Phyllostachys nigra, commonly known as ‘black bamboo,’ for its even surface and gentle fibers. White bamboo and smoke-stained bamboo is also used. Smoke-stained bamboo is unique in that it’s aged bamboo that comes from the roof or ceiling of old-style Japanese houses. Sometimes they’ve been in the ceiling for 100 or 200 plus years, slowly becoming stained from the smoke rising from the home’s fireplace.
STAGE 2: REMOVING THE SKIN
The bamboo is cut to the required length, and the skin is scraped off the upper part of the node.
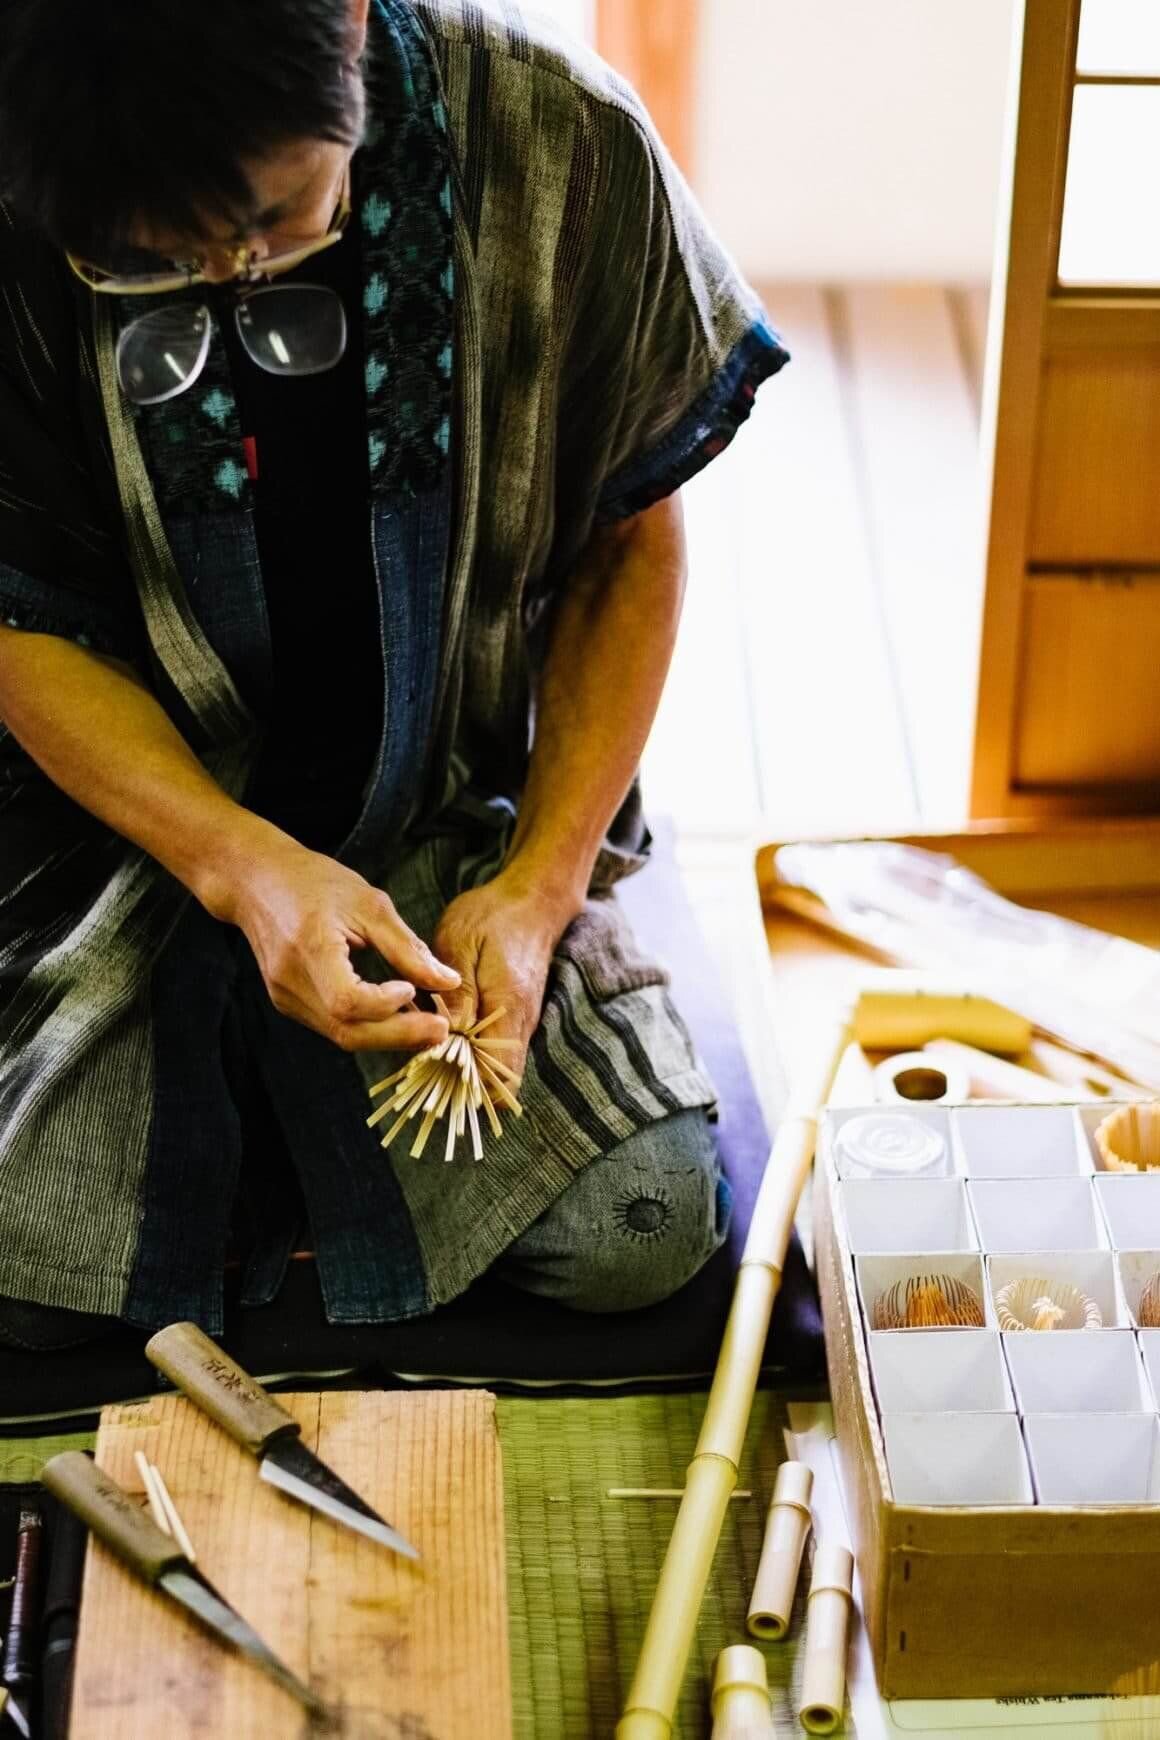
STAGE 3: SPLITTING THE SPLINES (HEGI)
The first process to create the whisk head is to split the stripped bamboo into splines. Kind of like cutting a cake or a pizza, it’s progressively halved with a splitting knife to make the splines. The number of splits varies with bamboo thickness, anywhere from 12 (for very small bamboo) and 24 (for very large). For our purposes, it’s 16—an average first split.
After splitting the pulp is removed from inside to thin the bamboo. Each spline is bent out and the wood is separated from the outer layer. The wood is then cut away.
STAGE 4: FINE SPLITTING (KOWARI)
The 16 parts are divided into 10 equal pieces each, thus creating a whisk with 160 equal tines.The splines are split into thick and thin pieces, alternately.
From each section of 10, 5 tines go into the center of the whisk, and 5 go to the outer circle. Thus meaning after this process there are 80 in the inner ring, and 80 in the outer ring.
STAGE 5: TASTE SHAVING (AJI KEZURI)
The heads of the tines are now dipped into hot water and, starting from the base of the spline, each one is thinned down towards its end. When the splines are thin enough, the ends are curled and the shape of the head is perfected.
The method of whittling the spline will be different depending on the desired shape of the whisk. The desired shape might be dependent on what tea school the whisk is being made for. For example, Mushakouji Senke school tea whisk tips are straight, while the Urasenke school whisks tips are curved like a fish hook.
This stage is said to be the most difficult, as the shape of the tines affects the taste of the tea.
STAGE 6: CHAMFERING (MENTORI)
Working at the near-microscopic level now, the two edges of each spline are now shaved individually to produce a 45˚ angle on each side, to prevent the powdered matcha tea from sticking to them.
This also helps with formation of the bubbles in matcha.

STAGE 7: THREADING (SHITAAMI,UEAMI)
Next, a thread is run between the outer ring of splines, so that they spread outward, while the inner ring remains in the center of the whisk (shitaami). They are then bound again (uwaami) in and out, between the inner ring of the splines twice, to reinforce them and their base.
Most tea whisks are tied with black thread, so any stains won’t stand out. Some schools use white thread though. Yellow thread is used for Buddhist memorial services, and red or white can be used for special celebrations.

Red and white threading for special occasions.
At this point I asked the master craftsman why there weren’t any women craftsmen. He said it was because, in his words (translated), they weren’t strong enough to do the cutting and wood bending. But that he often has them do the threading.
It was hard for me, because I was simultaneously thinking, “I respect you and the years of work you’ve put into perfecting this craft,” and “Come on buddy. Don’t you realize you’re just echoing the institutionalized sexism in this country? If your tiny ass can do this, I’m sure a woman can too.” People will tell themselves anything.
STAGE 8: SHAPING THE HEAD AND ADJUSTMENT (KOSHINARABE)
A bamboo spatula is now used to bring together the inner splines, and generally tidy up the whole head, including the size of the gaps between each spline.

STAGE 9: FINISHING
Really just the final touches. The shape of the whisk head is perfected and the craftsman goes between all the splines to make sure the gaps between them are even, that the height is good, and that their order is correct.
After this, that’s it, baby! You’re ready to whisk matcha. Although many whisks from this stage will then be boxed or put on a shelf.
If you visit Takayama, it's worth stopping into a few of the small artisan shops along the highway. There were some real gems in there. Things that you'd be hard-pressed to find anywhere else, and for a decent price compared to North American imports.

Many won’t be sold for years and can increase in price, especially if the craftsman is renowned. When we visited Yusetsu-san’s personal shop after, he had some whisks made by his father. The ones I saw were anywhere from one hundred to hundreds of dollars each.
How to use a matcha whisk
Once you have your matcha powder and hot water in a matcha bowl, whisk your matcha by moving the chasen as quickly as possible in an “M” shape (without scraping the bottom of the bowl), until you have a pale, creamy froth.
How to care for your matcha whisk
Before you make tea, fill your matcha bowl halfway with boiling water and let your whisk soak in the hot water for about 30 seconds, turning it so it become saturated with water and flexible. This helps prevent the delicate ends from splintering with use.
After you’ve made your matcha, lightly rinse your whisk and pat it dry. Never use soap on it or leave it standing in water.